Peer to peer: the new distribution paradigm

This post will hardly talk about rocket science, but there’s still a lot of ignorance on the subject.

A lot of people associate p2p with “piracy”, and eMule and BitTorrent with some shady way of obtaining the miraculous software of the big companies like Adobe or Microsoft.

Well, the fact is that p2p is a really advantageous way of sharing digital information through the net. Actually, the philosophy behind p2p is applicable to any process in which information, or some other good, is spread. So what is this philosophy? Simply put, p2p opposes a distributed way of obtaining t the goods, with a centralized one (see figure below).
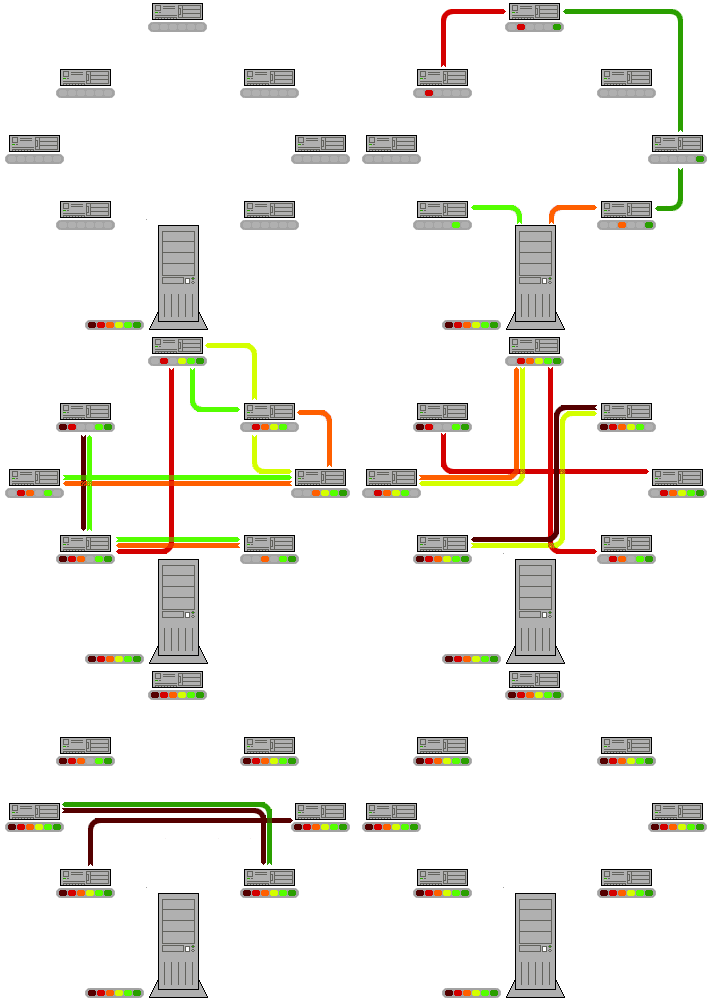


Figure 1: Scheme of operation of p2p network. From Wikipedia.

I use the BitTorrent p2p technology (with the KTorrent program) quite often, particularly to download Creative Commons music from Jamendo. Lately, I have used KTorrent to download some GNU/Linux CDs, particularly the 4.0 version of Debian, and the beta (and this weekend, the stable) version of Ubuntu Feisty Fawn. With the latter, I have come to feel more deeply the advantages of p2p over centralized distribution of files.

With a centralized way of downloading, there is an “official” computer (the server) that has the “original” version of the information to download, and all the people who want to get the info (the clients) have to connect to that server to get it. The result is quite previsible: if a given piece of software is highly sought, a lot of clients will flood the server, and it will not be able to provide all the clients with the info they request, slowing the transmission down, or even stopping it alltogether for further clients, once saturation is reached. This happened with the release of the Windows Vista beta, when the high demand of the program, and the low resources Microsoft devoted to serving the files, provoked a lot of angry users having to wait for unreasonable periods of time until being able to download it.

This problem could well happen with the release of Ubuntu Feisty Fawn, and in fact this morning connecting to the Ubuntu servers was hopeless. However, unlike Microsoft, Canonical decided to make use of the BitTorrent technology to serve the ISO files, and this made all the difference.

With a p2p way of serving the files, the first clients connect to the server to get the files. However, once they have downloaded a part of the files, they too become servers, and further clients can choose whether to download from the central server or from other clients/servers (usually the decision is taken automatically by the p2p program). As the net of clients grows, and the file flow is balanced, the download speed is maximized for all, and the load on the servers is kept within reasonable limits.

The advantages are clear: each person willing to download some files (e.g. the Ubuntu ISOs) does not become a leech, imposing a burden on the server, but rather a seeder, providing others with the files, and speeding up, not slowing down, the spread of the files. It is, thus the ideal way of distributing files.

However, it has two disadvantages that made Microsoft not use it to spread the Windows Vista beta: since there is no single server, controlled by a central authority, it is not possible to assert how many copies of the files have been distributed. Moreover, since the distribution net is scalable, it can not choke, and thus MS would not be able to claim that the demand for their product was so high that the servers were not able to attend it.

So, for promotional purposes, the p2p is not very good. If your priority is the client, and making the files as widely and quickly spread as possible, then p2p is for you.

Comments

SSH connection without password (II)

About 5 months ago I made a post explaining how to use SSH to connect from computer A to computer B without going through the hassle of introducing the password each and every time.

As it happens, my instructions were far from complete, because they relied upon not setting any passphrase, and thus saving the SSH password unencrypted in the hard disk. That way, a malicious user, if able to read your account in computer A, can connect in your name to computer B with no restriction (thanks agapito for pointing this out in a comment to my post).

Next step is, thus, to use use passphrases, but avoiding mayor hassles with ssh-agent.

I will repeat here the instructions in my old post, and extend them. First generate a public/private key pair in computer A:

% ssh-keygen -t dsa

and answer the questions you will be asked, not forgetting to enter a passphrase.

This will create two files in your ~/.ssh/ dir: id_dsa and id_dsa.pub, whith your private and public keys, respectively.

Now, you have to copy the contents of id_dsa.pub into a file named ~/.ssh/authorized_keys in computer B. From that moment on, you will be able to connect to B through SSH without being prompted for your user password in computer B. However, you will be prompted for a password: namely the passphrase that unencrypts the wallet to your actual password (they one you set with ssh-keygen).

To avoid having to introduce this passphrase each time we want to make a connection, we can take advantage of ssh-agent, in the following way. First, we run the agent:

% eval `ssh-agent`

Then we add our key to the agent:

% ssh-add

The above will look, by default, for ~/.ssh/id_dsa, and will ask for the passphrase we introduced when generating it with ssh-keygen.

After the above, all further connections from that terminal (and its children) will benefit from passwordless SSH connections to computer B (or any number of computers that have your A computer’s public DSA key in their ~/.ssh/authorized_keys file). This benefit will be lost whenever ssh-agent stops running, of course.

OK, but I want to have passwordless connections from ALL my consoles!

Then you have to take advantage of the following sintax:

% ssh-agent command

where, command and all of its children processes will benefit from ssh-agent. command could be, of course, startx, or any command you use to start the desktop environment. You will still have to execute ssh-add, and enter the passphrase, but only once in your whole session. You will have to enter the passphrase again only if you log out of the desktop environment and log in again.

OK, but how do I make scripts benefit from this

You will find yourself automating the execution of some scripts sooner or later, for example putting some backups in a cron.

To do so, a ssh-agent must be already running, and you have to make the script somehow hook to it. To do so, include the following code chunks in your scripts:

Perl:

Create the following subroutine:

###################################################
#                                                 #
# Check that ssh-agent is running, and hook to it #
#                                                 #
###################################################

sub ssh_hook
{
  my $user = $_[0] or die "Specify a username!\n";

  # Get ID of running ssh-agent:
  chomp(my $ssh_id = `find /tmp/ssh* -name 'agent.*' -user $user`);
  die "No ssh-agent running!\n" unless $ssh_id;

  # Make this ID available to the whole script, through
  # environment variable SSH_AUTH_SOCK:
  $ENV{SSH_AUTH_SOCK} = $ssh_id;
};

and call it (before any SSH call in the program), like this:

&ssh_hook(username);

tcsh:

setenv SSH_AUTH_SOCK `find /tmp/ssh* -name 'agent.*' -user username`

bash:

export SSH_AUTH_SOCK=$(find /tmp/ssh* -name 'agent.*' -user username);

In all cases username is the user name of the user making the connection (and having run ssh-agent).

A lot of info was taken from this Gentoo HowTo and this HantsLUG page, and googling for “ssh without password”.

Comments (2)

Bandwidth shaping made easy with Trickle

I have recently downgraded the bandwidth of my internet connection, switching to a flat rate (previously I had a monthly traffic limit, albeit with a wider bandwidth). This means that now I can download to my heart’s content, but it also means that when doing things like upgrading my Debian OS with aptitude, it eats all of my bandwidth, and I can barely do anything else in the Internet, untill all packages are upgraded.

A similar effect can happen when using p2p software like aMule or KTorrent, but these programs have options to throttle down their bandwidth usage (e.g., set maximum download and upload rates).

When dealing with programs that do not have this facility, we can always resort to Trickle, which can set arbitrary limits to any program it is used with. For example:

% trickle -d 20 aptitude upgrade

will run aptitude upgrade as usual, but with a maximum download rate of 20 kB/s. Note: aptitude usually spawns two processes (downloads files in couples, not one by one), and the limit imposed by trickle is applied to each process, so the used download bandwidth will be double that specified in the command line. Or, in other words, if you want aptitude to use X bandwidth, execute:

% trickle -d X/2 aptitude upgrade

Comments (2)

WiFi with WPA under Ubuntu/Debian

I finally made my new laptop connect with WPA encryption to my WiFi router!!

I could already connect it to WiFi networks with WEP encryption (or no encription at all), but WPA proved harder.

Mini HowTo

1) My setup is the following:

WiFi router: SMC Barricade WBR14-G2
WiFi card in laptop: Intel PRO/Wireles 3945
OS: Ubuntu 6.06 LTS (Dapper Drake)

2) The router settings:

Wireless encryption: WPA/WPA2 Only
Cipher suit: TKIP+AES (WPA/WPA2)
Authentication: Pre-shared Key (yes, I know 802.1X would be more secure… sue me)
Pre-shared key type: Passphrase (8~63 characters)

3) The package one needs to install:

# aptitude install wpasupplicant

4) Making WPA supplicant run:

First, create a config file, by the name /etc/wpa_supplicant.conf, and inside it, write:

ctrl_interface=/var/run/wpa_supplicant
ap_scan=1

network={
  ssid="your_ssid_name"
  scan_ssid=0
  proto=WPA RSN
  key_mgmt=WPA-PSK
  pairwise=TKIP CCMP
  group=TKIP CCMP
  psk="your_preshared_key"
  priority=5
}

At that point, you should make sure that the WiFi is turned on, and that the correct driver is loaded. In my case:

# modprobe ipw3945

Then, to test the WPA supplicant, run:

# wpa_supplicant -Dwext -ieth1 -c /etc/wpa_supplicant.conf

Recall I have used the wext device, instead of the ipw one, that would seem the appropriate one. Well, I read somewhere, that with 2.6.16 kernels and newer, this should be the case. Now I recall that my kernel is 2.6.15… nevermind, it works that way, and not the other (with -Dipw).

Recall also that my wireless device is eth1. Your mileage may vary (but each wireless card model gives rise to a precise device name, don’t worry).

If everything went fine, the output for the above command should be something like:


# wpa_supplicant -Dwext -ieth1 -c /etc/wpa_supplicant.conf
Trying to associate with xx:xx:xx:xx:xx:xx (SSID='xxxxxxxx' freq=0 MHz)
CTRL-EVENT-DISCONNECTED - Disconnect event - remove keys
Authentication with 00:00:00:00:00:00 timed out.
Associated with xx:xx:xx:xx:xx:xx
WPA: Key negotiation completed with xx:xx:xx:xx:xx:xx [PTK=CCMP GTK=TKIP]
CTRL-EVENT-CONNECTED - Connection to xx:xx:xx:xx:xx:xx completed (auth)

If you see that “negotiation completed”, it worked (Ctr-C to exit the above).

5) Automating the WPA connection when bringing wireless interface up

Next, I’ll explain the small changes one has to make to /etc/network/interfaces to correctly bring up the interface. As I said, my wireless interface is eth1, so, I added the lines below to the aforementioned config file:


iface eth1 inet dhcp
wireless-essid my_wireless_essid
pre-up wpa_supplicant -Bw -Dwext -ieth1 -c /etc/wpa_supplicant.conf
post-down killall -q wpa_supplicant

And that’s all! Whenever you ifup eth1, you’ll bring up the wireless interface, with WPA encryption working.

Comments (5)

Euskaltel (y II)

Hace tres días comenté un problemilla que tuve con la conexíon a Internet de Euskaltel.

Pues bien, ahora cuento el final de la historia: el mismo día 18 a la tarde Euskaltel llamó a mi casa para decir que el problema estaba arreglado (dejé el cablemódem encendido, para que hicieran pruebas, si tenían que hacerlas). O en otras palabras: el fallo era de ellos, pero yo no he visto que me hayan pagado el dinero que yo habría tenido que pagarles yo (según ellos) si hubiese venido un técnico y el error hubiese sido mío.

Nota: parece que la tabla de enrutamiento no era, porque sigo teniendo el mismo gateway (lo que no he mirado es la máscara de subred, ¡cachis!).

Comments

Euskaltel: avanzamos por tí

¿Por qué alguien contrataría Euskaltel para su acceso a Internet, en vez de ofertas mucho más competitivas, como Jazztel? Pues está claro: por la atención al cliente, y por la fiabilidad del servicio… ¿no?

Esta mañana mi conexión a Internet me ha dejado de funcionar. Tengo contratada banda ancha a 1Mb con fibra óptica de Euskaltel. La asignación de IP la hacen, como casi todas las ISPs, con DHCP. Pues bien, cuando mi ordenador pedía (a través del cable-módem) una IP, el servidor DHCP me la daba (por lo tanto la conexión funcionaba), pero luego no podía conectarme a nada.

Ya, ya sé: mala configuración de los DNSs. Pues no. El servidor DHCP me daba los DNSs correctos automáticamente. He probado a hacer ping a los servidores de DNS, e incluso a la máquina que me ha adjudicado la IP por DHCP (que obviamente sé que está funcionando correctamente), y ningún ping ha obtenido respuesta. Y tampoco es el firewall, porque las conexiones salientes están prácticamente sin restringir. Estoy por pensar que es la tabla de enrutamiento, ya que mis paquetes salían por una puerta de IP xx.yy.96.1, cuando mi IP era xx.yy.108.zz. Estoy no quiere decir que estén en diferentes subredes (96 y 108 pueden pertenecer a una misma subred), pero si lo fuera, eso explicaría mis problemas, además de demostrar un fallo gordo por parte de algún “genio” de Euskaltel.

Pues bueno, llamo al 1718 (incidencias), y me atiende un tío que lo primero que me dice es que reinicie el ordenador. Joder, tío, que no estoy usando Windows. Conversación:

РReinicia el ordenador Рdice ̩l.
– Es que no uso Windows, uso Linux – contesto
– Reinicia el ordenador, es para reiniciar el módem.
– ¿Y no vale con desenchufar el módem?
– Reinicia el ordenador
– ¿Y si desenchufo el cable RJ45 del ordenador?
– Reinicia el ordenador

Ante su cerrilidad, apago el ordenador, y me quedo con las ganas de decir que a ver si no vale con hacer ifdown eth0 && ifup eth0. Lamentablemente, dudo que supiera qué es un ifconfig aunque uno le mordiera el culo.

Su siguiente consejo es, obviamente, apagar el módem, luego encenderlo, y luego encender el ordenador. Ahora que lo pienso, me queda la duda de si quería que al encender el módem el ordenador estuviera encendido (recien reiniciado), y luego volver a reinicial el ordenador, con el módem encendido… Duda irrelevante, porque eso de reiniciar el módem ya lo había intentado yo, pero bueno.

En fin, que el problema (obviamente) ha seguido igual. Me ha dicho que si quería me mandaban un técnico, y yo le he dicho que, a menos que yo llame de nuevo no (me paso lo mismo, creo, hace un tiempo, y se solucionó “ello solo”).

Lo más gracioso de la conversación fue el final:

– Por si acaso le aviso que si va el técnico y el error está en su ordenador, le cobraríamos XXX – me suelta el tío.
– Ya, y si viene el técnico, y el problema resulta ser culpa de Euskaltel, ¿cuánto cobro yo a Euskaltel? Si el problema fuese de uds, me cobrarían el mes igual, ¿verdad? – le contesto.
– Sí – me dice, un poco “apenado”, pero sin cortarse un pelo.
– Ya veo, muy listos son uds.

Durante un milisegundo me pareció de lo más normal que un técnico viniera y me lo arreglase gratis, pero que si la culpa era mía, me lo cobrasen, porque igual soy un patán que se ha cargado el ordenador.

Pero luego me he dado cuenta de que tienen un morro que se lo pisan. Si el fallo es mío, estaría bien que cobraran… pero solo si cuando el fallo es de Euskaltel te libraran, por ejemplo, de pagar ese mes de conexión. Pero no. No importa si te cortan arbitrariamente la red, si de vez en cuando está saturada, si hay algún fallo: te lo arreglan “gratis” y ya está. Pero si es al revés tienes que pagar… ¡Qué listillos!

Comments (2)

My backups with rsync

In previous posts I have introduced the use of rsync for making incremental backups, and then mentioned an event of making use of such backups. However, I have realized that I haven’t actually explained my backup scheme! Let’s go for it:

Backup plan

I make a backup of my $home directory, say /home/isilanes. Each “backup” will be a set of 18 directories:

  • Current (last day)
  • 7 daily
  • 4 weekly
  • 6 monthly

Each such dir has an apparent complete copy of how /home/isilanes looked like at the moment of making the backup. However, making use of hard links, only the new bits of info are actually written. All the parts that are redundant are written once on disk, and then linked from all the places referring to it.

Result: a 18 copies of a $home of 3.8 GB in a total of 8.7 GB (14% of the apparent size of 63 GB, and 13% of 18x the info size, 68,4 GB).

Perl script for making the backup

Update (Jun 5, 2008): You can find a much refined version of the script here. It no longer requires certain auxiliary script to be installed in the remote machine, and is “better” in general (or it should be!)

Below is the commented Perl script I use. Machine names, directories and IPs are invented. Bart is the name of my computer.


#!/usr/bin/perl -w

use strict;

my $rsync = "rsync -a -e ssh --delete --delete-excluded";
my $home = "/home/isilanes";
my $logfile = "$home/.LOGs/backup_log";

#
# $where -> where to make the backup
#
# $often -> whether this is a daily, weekly or monthly backup
#
my $where = $ARGV[0] || 'none';
my $often = $ARGV[1] || 'none';

my ($source,$remote,$destdir,$excluded,$to,$from);

# Possible "$where"s:
my @wheres = qw /machine1 machine2/;

# Possible "$often"s:
my @oftens = qw /daily weekly monthly/;

# Check remote machine:
my $pass = 0;
foreach my $w (@whats) { $pass = 1 if ($what eq $w) };
die "$what is an incorrect option for \"what\"!\n" unless $pass;

# Check how-often:
$pass = 0;
foreach my $o (@oftens) { $pass = 1 if ($often eq $o) };
die "$often is an incorrect option for \"often\"!\n" unless $pass;

# Set variables:
if ($what eq 'machine1')
{
# Defaults:
$source = $home;
$remote = '0.0.0.1';
$destdir = '/disk2/backup/isilanes/bart.home.current';
$excluded = "--exclude-from $home/.LOGs/excludes_backup.dat";
$to = 'machine1';
$from = 'bart';
}
elsif ($what eq 'machine2')
{
# Defaults:
$source = $home;
$remote = '0.0.0.2';
$destdir = '/scratch/backup/isilanes/bart.home.current';
$excluded = "--exclude-from $home/.LOGs/excludes_backup.dat";
$to = 'machine2';
$from = 'bart';
}

# Do the job:
unless ($what eq 'none')
{
unless ($often eq 'none')
{
# Connect to the remote machine, and run ANOTHER script there, making a rotation
# of the backup dirs:
system "ssh $remote \"/home/isilanes/MyTools/rotate_backups.pl $often\"";

# Actually make the backup:
system "$rsync $excluded $source/ $remote:$destdir/";

# "touch" the backup dir, to give it present timestamp:
system "ssh $remote \"touch $destdir\"";

# Enter a line in the log file defined above ($logfile):
&writelog($from,$often,$to);
};
};

sub writelog
{
my $from = ucfirst($_[0]);
my $often = $_[1];
my $to = uc($_[2]);
my $date = `date`;

open(LOG,">>$logfile");
printf LOG "home@%-10s %-7s backup at %-10s on %1s",$from,$often,$to,$date;
close(LOG);
};

As can be seen, this script relies on the remote machine having a rotate_backups.pl Perl script, located at /home/isilanes/MyTools/. That script makes the rotation of the 18 backups (moving current to yesterday, yesterday to 2-days-ago, 2-days-ago to 3-days-ago and so on). The code for that:


#!/usr/bin/perl -w

use strict;

# Whether daily, weekly or monthly:
my $type = $ARGV[0] || 'daily';

# Backup directory:
my $bdir = '/disk4/backup/isilanes/bart.home';

# Max number of copies:
my %nmax = ( 'daily' => 7,
'weekly' => 4,
'monthly' => 6 );

# Choose one of the above:
my $nmax = $nmax{$type} || 7;

# Rotate N->tmp, N-1->N, ..., 1->2, current->1:
system "mv $bdir.$type.$nmax $bdir.tmp" if (-d "$bdir.$type.$nmax");

my $i;
for ($i=$nmax-1;$i>0;$i--)
{
my $j = $i+1;
system "mv $bdir.$type.$i $bdir.$type.$j" if (-d "$bdir.$type.$i");
};

system "mv $bdir.current $bdir.$type.1" if (-d "$bdir.current");

# Restore last (tmp) backup, and then refresh it:
system "mv $bdir.tmp $bdir.current" if (-d "$bdir.tmp");
system "cp -alf --reply=yes $bdir.$type.1/. $bdir.current/" if (-d "$bdir.$type.1");

Comments

Article in Science

I have just read a rather interesting article in Science about the economics of information security (R. Anderson and T. Moore, Science, 2006, 314, 610), and I would like to comment some quotes of it:

There has been a vigorous debate between software vendors and security researchers over whether actively seeking and disclosing vulnerabilities is socially desirable. Rescorla has argued that for software with many latent vulnerabilities (e.g. Windows), removing one bug makes little difference to the likelihood of an attacker finding another one later[1].

Quite interesting! First, even a paper on Science not only regards Windows as a piece of software with a virtually endless reservoir of internal errors, but it even uses it as a paradigmatic example of such a case. Second, it deems such software as not worth patching, and bugs not worth being disclosed (security through obscurity), because they are so many.

[…] [Rescorla] argued against disclosure and frequent patching unless the same vulnerabilities are likely to be rediscovered later. Ozment found that for FreeBSD[2] […] vulnerabilities are indeed likely to be rediscovered[3]. Ozment and Schecher also found that the rate at which unique vulnerabilities were disclosed for the core and unchanged FreeBSD operating system has decreased over a 6-year period[4]. These findings suggest that vulnerability disclosure can improve system security over the long term.

I have read [1] and [3] very briefly, and Ozment seems very critical of Rescorla’s results. However, the comparison between Windows and FreeBSD (I think they mean OpenBSD), which is FLOSS, is quite nice. Windows is so buggy that patching it is hopeless. FreeBSD has seen a decline in the number of disclosed bugs (remember that, being FLOSS, all the bugs found by developers, mantainers and users are disclosed), related to the fact that each bug fixed actually means a reduced probability of finding new bugs (because the total is not endless).

The bottom line is that, for a good piece of software (one that is not so bug-ridden that crackers never “rediscover” an old bug, because there are sooo many new ones to discover), disclosing the bugs is better. It is so because it speeds the patching rate, which in turn reduces the amount of exploitable bugs, which in turn improves the security. The connection between patching bugs and reducing significantly the amount of exploitable bugs can be made when the amount of bugs is small enough that new crackers are likely to rediscover old bugs, and then it would have paid to patch those bugs. Notice also that this is an auto-catalytic (self-accelerated) process: the more bugs disclosed, and more bugs patched, the less bugs remain, so the more it pays to further disclose and patch the remaining bugs, because the less bugs, the relatively more it pays to patch.

Vulnerability disclosure also helps to give vendors an incentive to fix bugs in subsequent product releases[5]. Arora et al. have shown through quantitative analysis that public disclosure made vendors respond with fixes more quickly; the number of attacks increased, but the number of reported vulnerabilities declined over time[6]

Good point! Not only disclosing the bugs is good for the consumers because it directly increases its quality, but also because it helps enforce a better behavior of the vendors. This is a key idea in the article, which delves in the fact that security policies are best when the one enforcing them is the one suffering from their errors. However, nowadays there is little pressure on the vendors to produce more secure software, because the buyer has little knowledge to judge this aspect of the quality, and ends up favoring a product for its looks or the alleged features, regardless of stability or security. Disclosing the bugs helps the buyer to assess the security of a program, thus making a better-balanced choice when buying. This, in return, leads to a more secure software in general, because vendors will have a big incentive to make their products more secure (which they don’t really have now).

[1] E. Rescorla, paper presented in the Third Workshop on the Economics of Information Security, Minneapolis, 13 to 14 May 2004 (PDF)
[2] I suspect the authors are mistaking OpenBSD for FreeBSD
[3] A. Ozment, paper presented at the Fourth Workshop on the Economics of Information Security, Cambridge, MA, 2 to 3 June 2005 (PDF)
[4] A. Ozment, S.E. Schechter, paper presented at the 15th USENIX Security Symposium, Vancouver, 31 July to 4 August 2006 (HTML).
[5] A. Arora, R. Telang, H. Xu, paper presented at the Third Workshop on the Economics of Information Security, Minneapolis, 13 to 14 May 2004 (PDF)
[6] A. Arora, R. Krishnan, A. Nandkumar, R. Telang, Y. Yang, paper presented at the Third Workshop on the Economics of Information Security, Minneapolis, 13 to 14 May 2004 (PDF)

Comments

SSH connection without password

[Update (24/03/2007): see new post on subject]

Following Txema’s wonderful explanations, and translating from Basque a Dec 2, 2002 e-mail, here they go the instructions to connect from computer A to B via SSH, without computer B ever asking for our password.

Notice that it is not a security breach, because we are allowing a certain computer A (and user) to connect to B. Of course, if A is somehow compromised, then applying this recipe would give the attacker hability to connect from A to B with no hassle. If you fear computer A being compromised, then don’t do it.

On the other hand, it can actually be a hardening of the security of computer B. If only a certain user of A is allowed to connect to B without password, and then remote passwords are deactivated (making that, if you need to input a password, you can not connect), then a cracker breaking into A would have to first break into the account of that certain user to access B. Otherwise, no other user is allowed to try to connect to B from A.

Whatever…. Let’s get going:

In computer A, generate a DSA key for that machine (and account):

ssh-keygen -t dsa

This creates the following file at ~/.ssh/:

id_dsa.pub

The contents of such file should be copy-pasted (beware line-breaking, because it is a single, very long, line) into B, namely into a file called (create if doesn’t exist, append to it if it exists) ~/.ssh/authorized_keys2.

Now, the A user in whose ~/.ssh/ resides the id_dsa.pub, will be able to connect without password to the B computer account of the user in whose ~/.ssh/ is the authorized_keys2 file.

Comments (2)

Private networks for dummies

Maybe you have two computers at home, with no router, and no wireless, and want both to share an Internet connection. Or maybe you want to set up a home LAN with non-public addresses. If so, read on.

I have set up my laptop to use my desktop computer as a NAT to connect to the Internet.

Requirements and setup

Your NAT computer needs two Ethernet cards: one to connect it to the Internet, and another one to connect it to the laptop. You also need a crossover cable, to connect the laptop to the desktop computer.

The physical setup is easy: make the connections as below:

Desktop computer setup

You need to set eth1 (second NIC) of your comp to connect to the LAN, and leave the eth0 as it was (to connect to the internet). Edit /etc/network/interfaces (for Debian. Other distros, edit the corresponding file), and add (suposing the network you want to create is 192.168.10.0):

iface eth1 inet static
  address 192.168.10.1
  netmask 255.255.255.0
  broadcast 192.168.10.255
  gateway 192.168.10.1
  post-up route del -net 0.0.0.0 gw 192.168.10.1 eth1
  post-up route add -net 192.168.10.0 netmask 255.255.255.0 gw 192.168.10.1 eth1

The last two lines (man interfaces) remove the default routing path that bringing up eth1 sets, because we want eth0 to still be the default, with only signals going to 192.168.10.0 network being routed through eth1. The latter is set by the last line.

Laptop setup

We have to modify /etc/network/interfaces, too. Here it’s eth0 that we set up:

iface eth0 inet static
  address 192.168.10.2
  netmask 255.255.255.0
  broadcast 192.168.10.255
  gateway 192.168.10.1

Comments

« Previous Page« Previous entries « Previous Page · Next Page » Next entries »Next Page »